

ICTFax User Guide
This guide shows you how to use the ICTFax Community Edition web interface day to day. You’ll log in, send a fax from the browser, keep reusable fax documents, read the faxes you receive, manage contacts and a do-not-fax list, and decide what happens when a fax arrives on one of your numbers.
If ICTFax isn’t installed yet, start with the ICTFax installation guide. If you run the server and need to set up trunks, numbers, users or extensions, read the ICTFax admin guide instead.
Logging in
Open the ICTFax address in your browser. You’ll see the Sign In page.
- Type your Email address. ICTFax logs you in with the email address on your user account, not a separate username.
- Type your Password.
- Click Sign In.
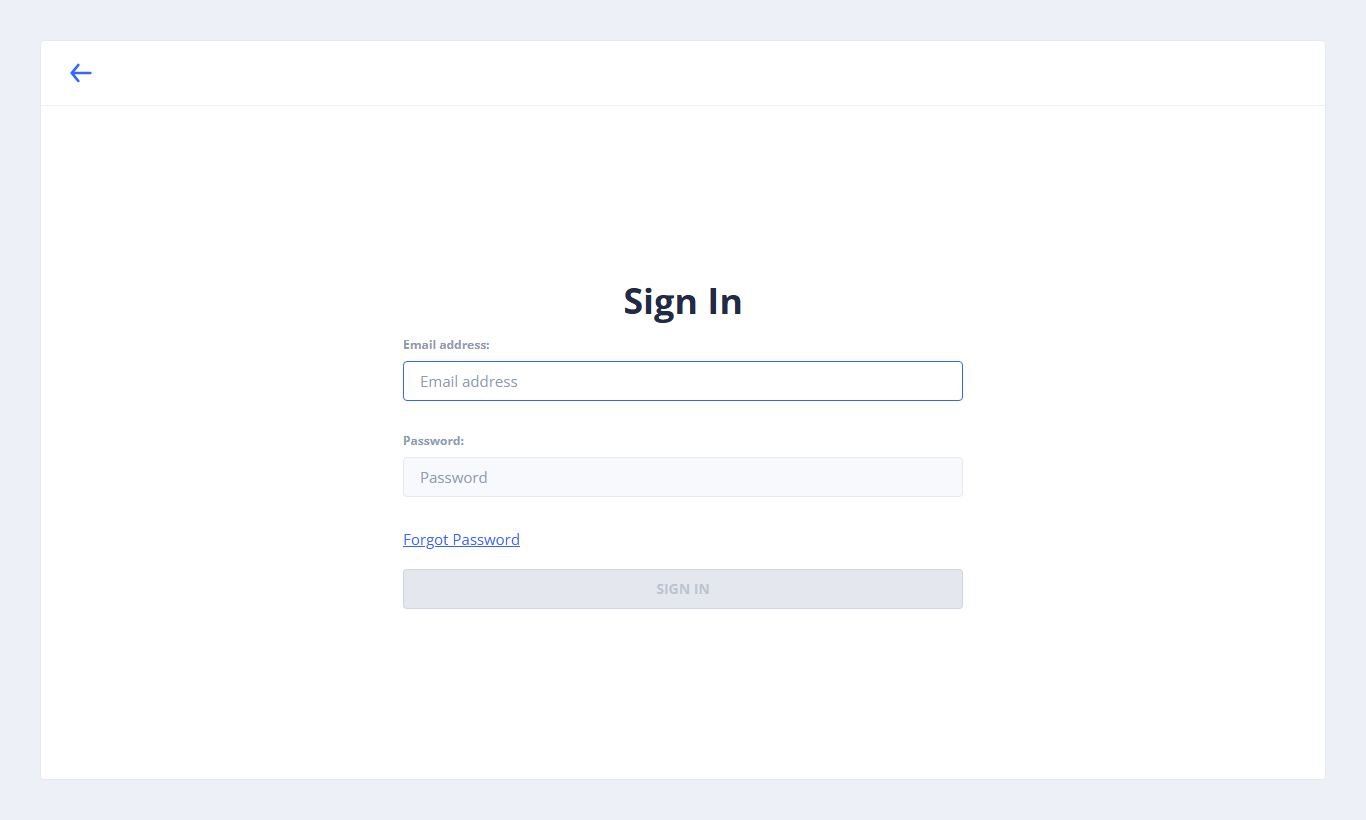
Forgot your password? Click Forgot Password under the password box and enter your email address. ICTFax emails you a link to set a new one.
Theme and language
Two switches sit at the top right of every page. The first flips the interface between Light and Dark. The second changes the language: English, French, Italian or Japanese. Your name sits next to them; click it to reach Change Password and Log out.
The menu
The left menu holds everything you need as a fax user:
- Dashboard: totals and recent outbound faxes.
- Send Fax: send a fax and track what you’ve sent.
- Receive Fax: faxes that came in on your numbers.
- Contacts: your address book.
- Contact DNC: numbers that must never be faxed.
- Fax Documents: files you keep for sending again.
- My DIDs: your inbound fax numbers and where their faxes go.
Below these sits Administration, the admin’s area for trunks, numbers, users and extensions. It’s covered in the admin guide.
Your first fax in five steps
In a hurry? Here’s the short path. Each step is explained in full further down.
- Log in with your email address and password.
- Click Send Fax, then New Outbound Fax.
- Give the fax a title and upload your PDF, or pick a saved document.
- Type the destination fax number and choose which of your numbers to show as caller ID.
- Click Submit, then watch the status in the Outbound Fax list.
Nothing happens? Make sure your administrator has set up a provider (trunk). Without one, ICTFax has no way to reach the phone network.
Dashboard
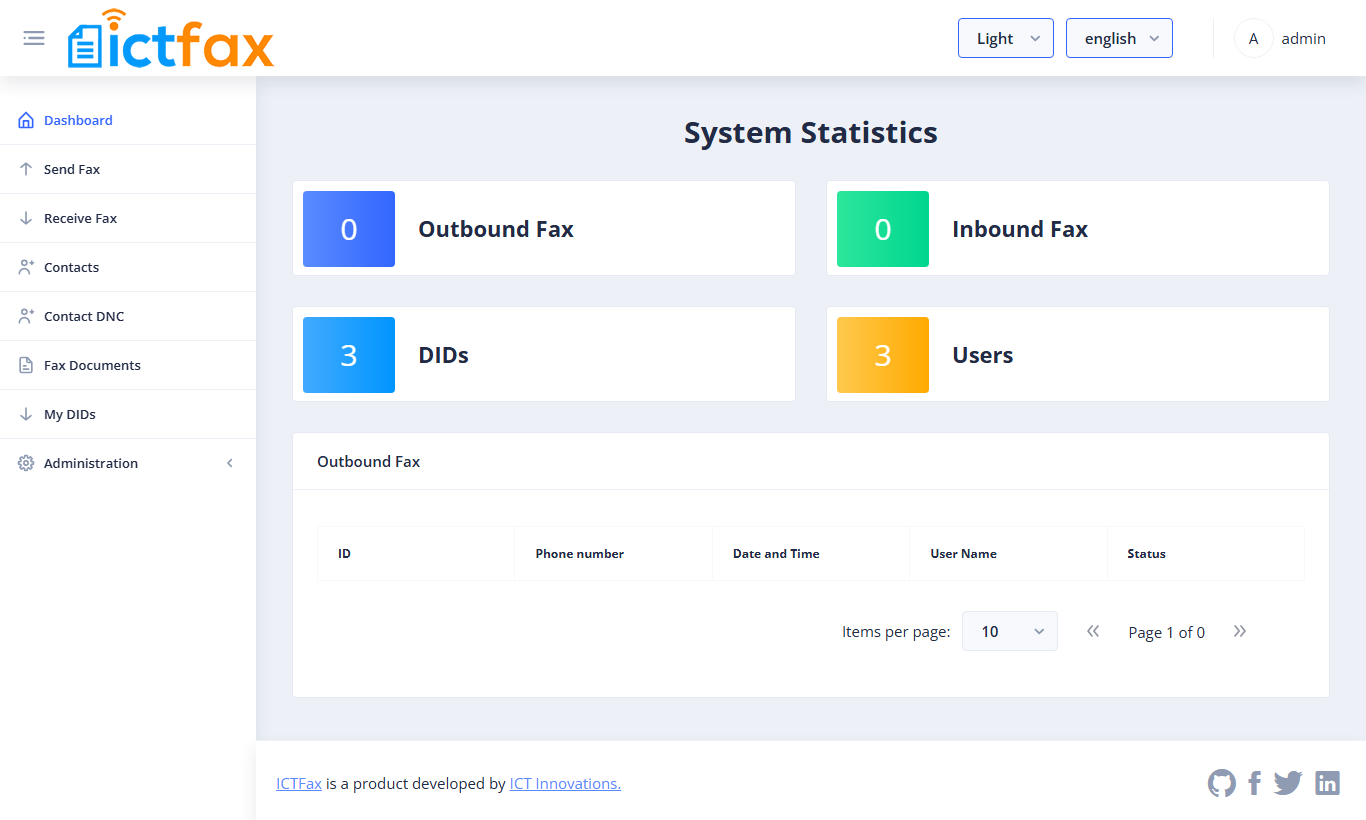
The Dashboard opens after you log in. Under System Statistics you’ll find four counters: Outbound Fax, Inbound Fax, DIDs and Users. Below them, an Outbound Fax table lists recent sends with the ID, phone number, date and time, user name and status. It’s the quickest way to see whether today’s faxes went through.
Send Fax
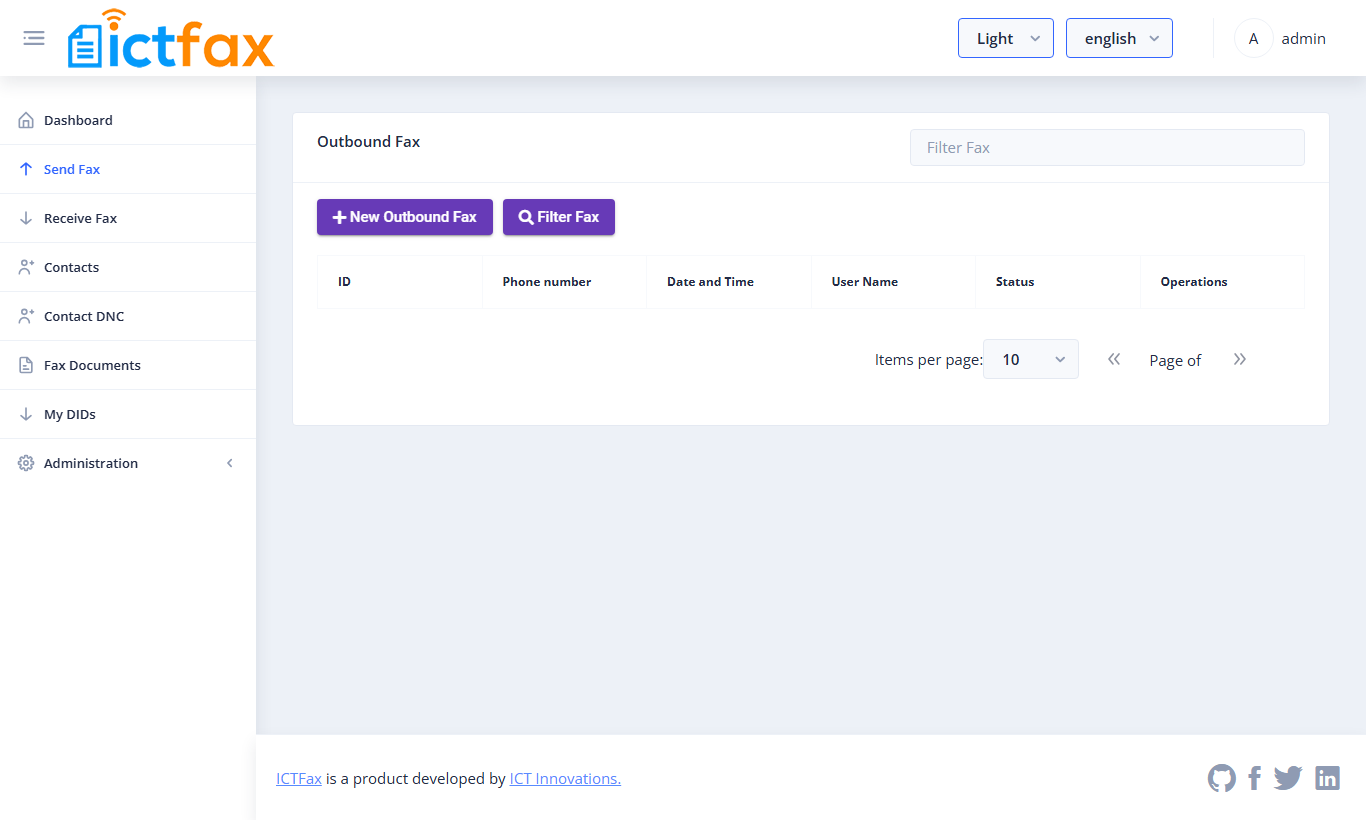
Click Send Fax in the menu. The Outbound Fax list shows every fax you’ve sent, with its ID, phone number, date and time, user name, status and operations.
Sending a fax
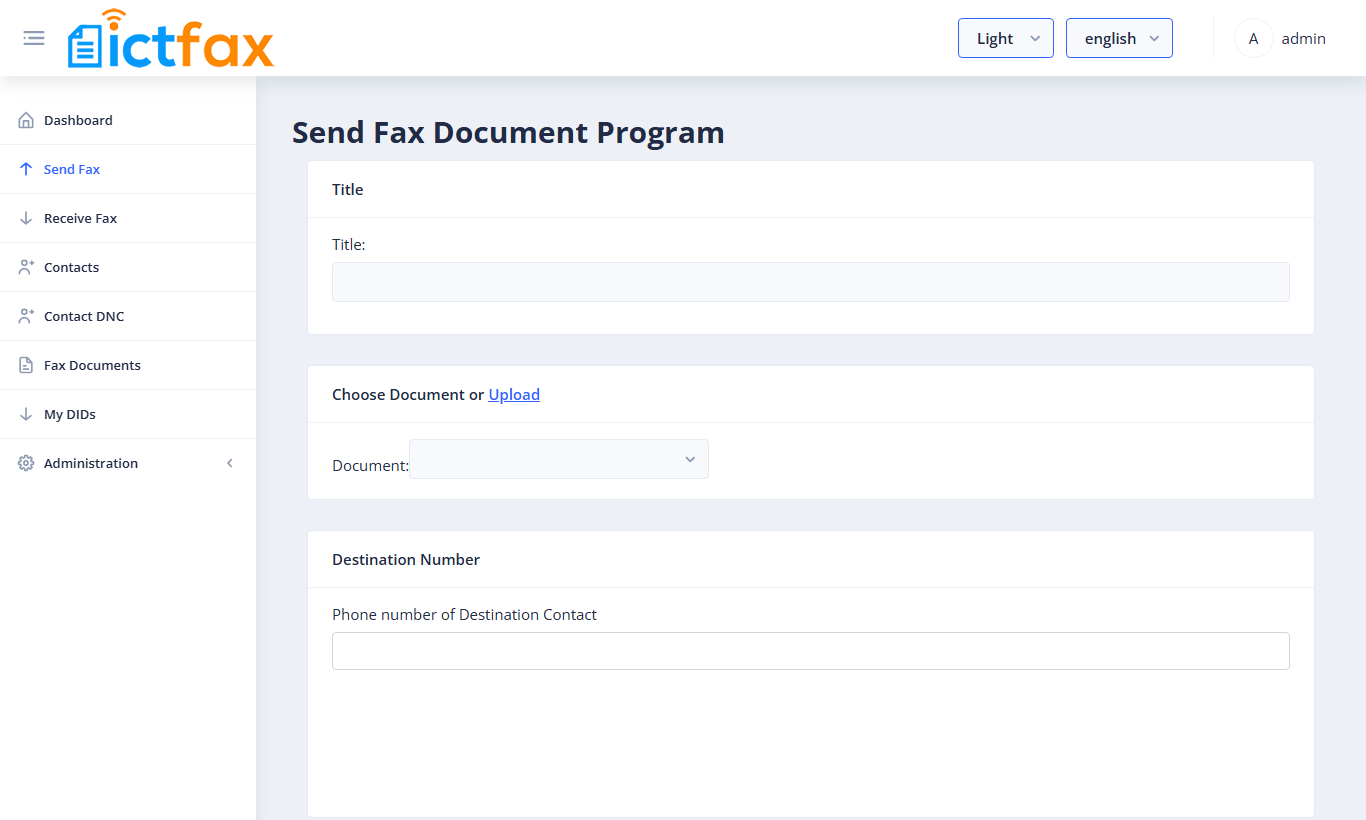
Click New Outbound Fax. The Send Fax Document Program page opens. Fill it in from top to bottom:
- Title: a name for this fax so you can find it in the list later, for example “Invoice 1001”.
- Choose Document or Upload: pick a saved file from the Document drop-down, or click Upload to send a new file. Uploads accept PDF, TIF/TIFF, PNG and JPG/JPEG. When you upload, give the document a name and, if you like, a description. ICTFax saves the upload as a Fax Document, so you can pick it again next time.
- Fax quality: Standard, Fine or Super. Standard suits plain text. Pick Fine or Super for small print, signatures or images.
- Destination Number: the fax number you’re sending to, in the box labelled “Phone number of Destination Contact”.
- Choose caller ID: which of your numbers the receiving fax machine shows as the sender.
- Retry: how many times ICTFax tries again if the call fails, 1, 2 or 3 attempts.
- Click Submit.
The fax appears in the Outbound Fax list straight away, and its status updates as ICTFax dials and transmits.
Finding a fax in the list
Type in the Filter Fax box at the top right to narrow the list, or click the Filter Fax button to filter by a field (such as the phone number) and by status. That’s handy when you’re hunting for one failed fax among hundreds.
What the statuses mean
Each fax in the list shows one of these statuses:
- Pending: the fax is queued and hasn’t started yet.
- Processing: ICTFax is dialling or sending it right now.
- Completed: the fax went through.
- Failed: ICTFax tried, including any retries, and couldn’t deliver it.
- Invalid: the number or the fax data wasn’t valid, so it couldn’t be sent.
- Failed (dnc): the destination is on your Contact DNC list, so ICTFax didn’t dial it at all.
Fax Documents
Sending the same price list, form or terms sheet again and again? Save it once under Fax Documents and pick it from the Document drop-down every time you send.
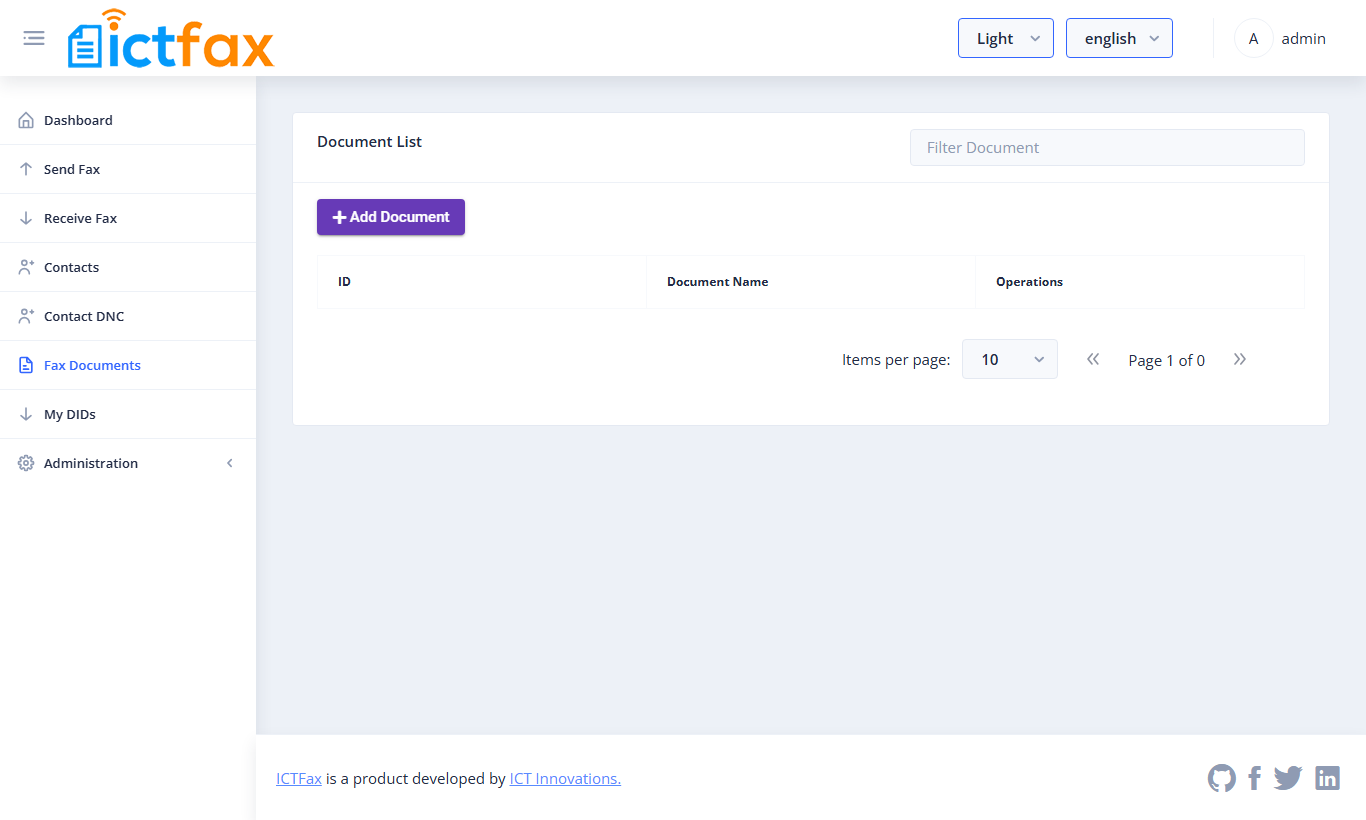
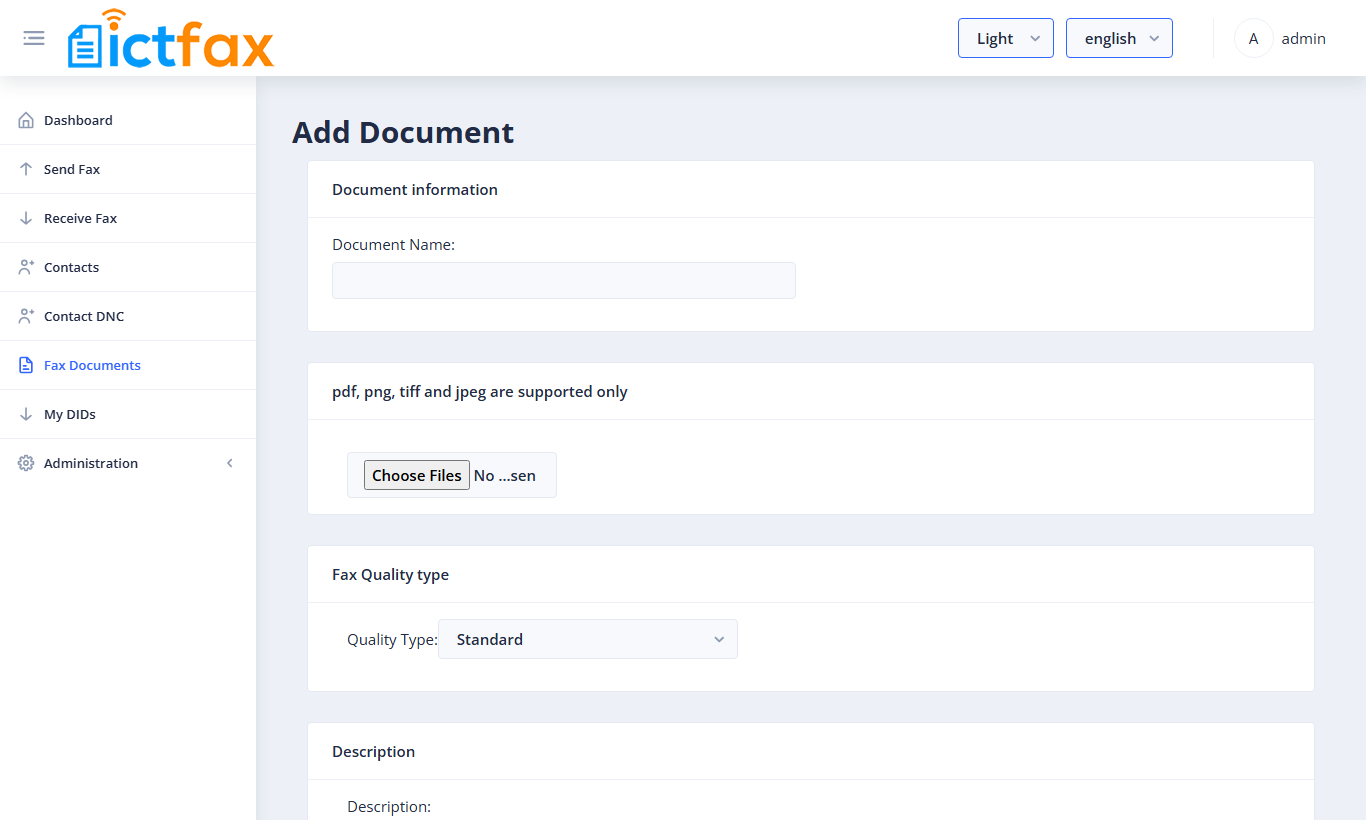
- Click Fax Documents, then Add Document.
- Under Document information, enter a Document Name.
- Click Choose Files and pick your file. The page lists the supported types: PDF, PNG, TIFF and JPEG.
- Set the Fax Quality type: Standard, Fine or Super.
- Add a Description if it helps you tell documents apart.
- Click Submit.
The document now shows in the Document List, and you can reuse it for as many faxes as you like. Use the edit and delete icons in the Operations column to change or remove it.
Receive Fax
Click Receive Fax to open the Inbound Fax list. Every fax that arrives on one of your numbers lands here, with its ID, user name, phone number, status, and date and time. Use the icons in the Operations column to view or download a fax, and the Filter Fax box or button to find an older one.
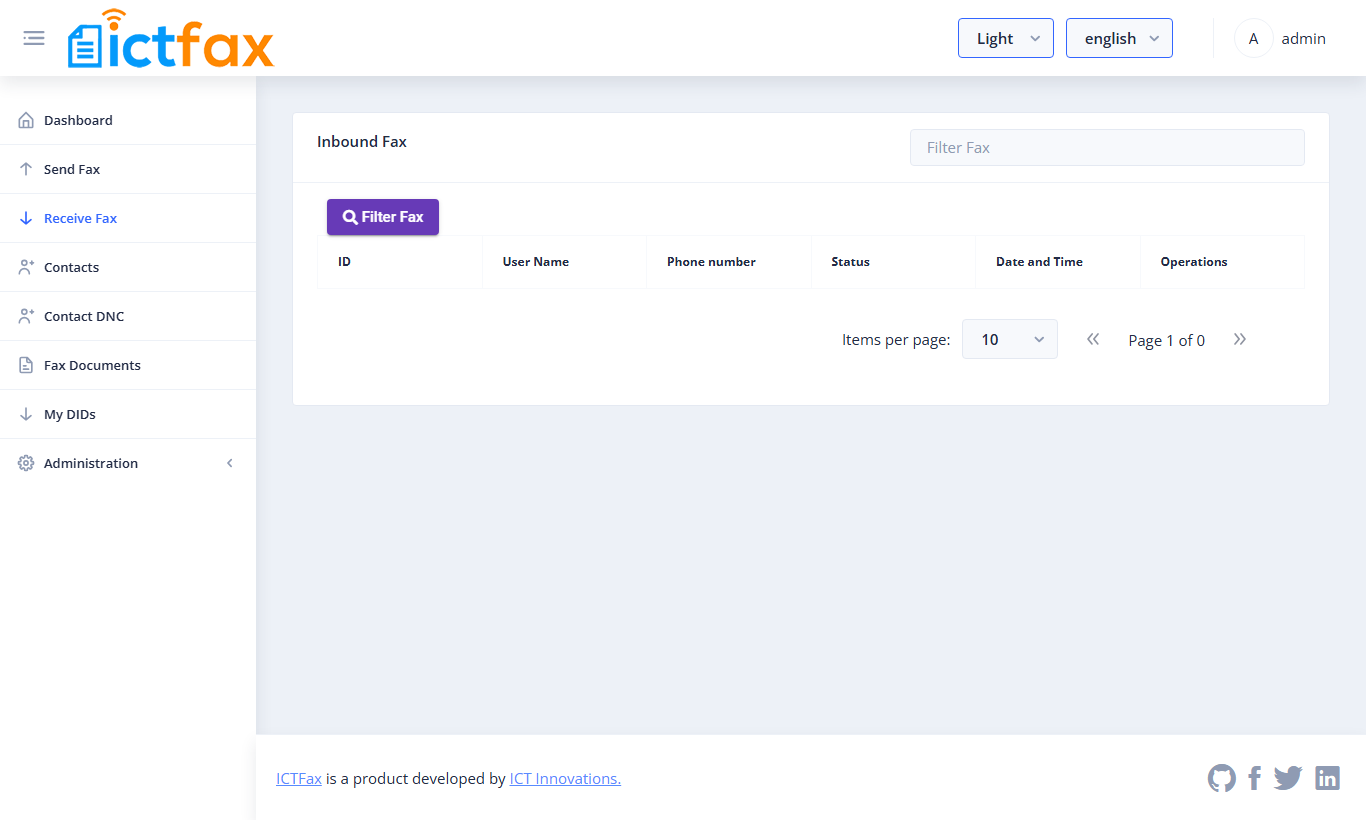
One thing to know: if a number is set to Forward to Extension (see My DIDs below), the fax goes live to a fax machine and ICTFax doesn’t store it. Those faxes won’t show up here.
Contacts
The Contact List is your fax address book. It shows each contact’s first name, last name, email and phone, with edit and delete icons beside them.
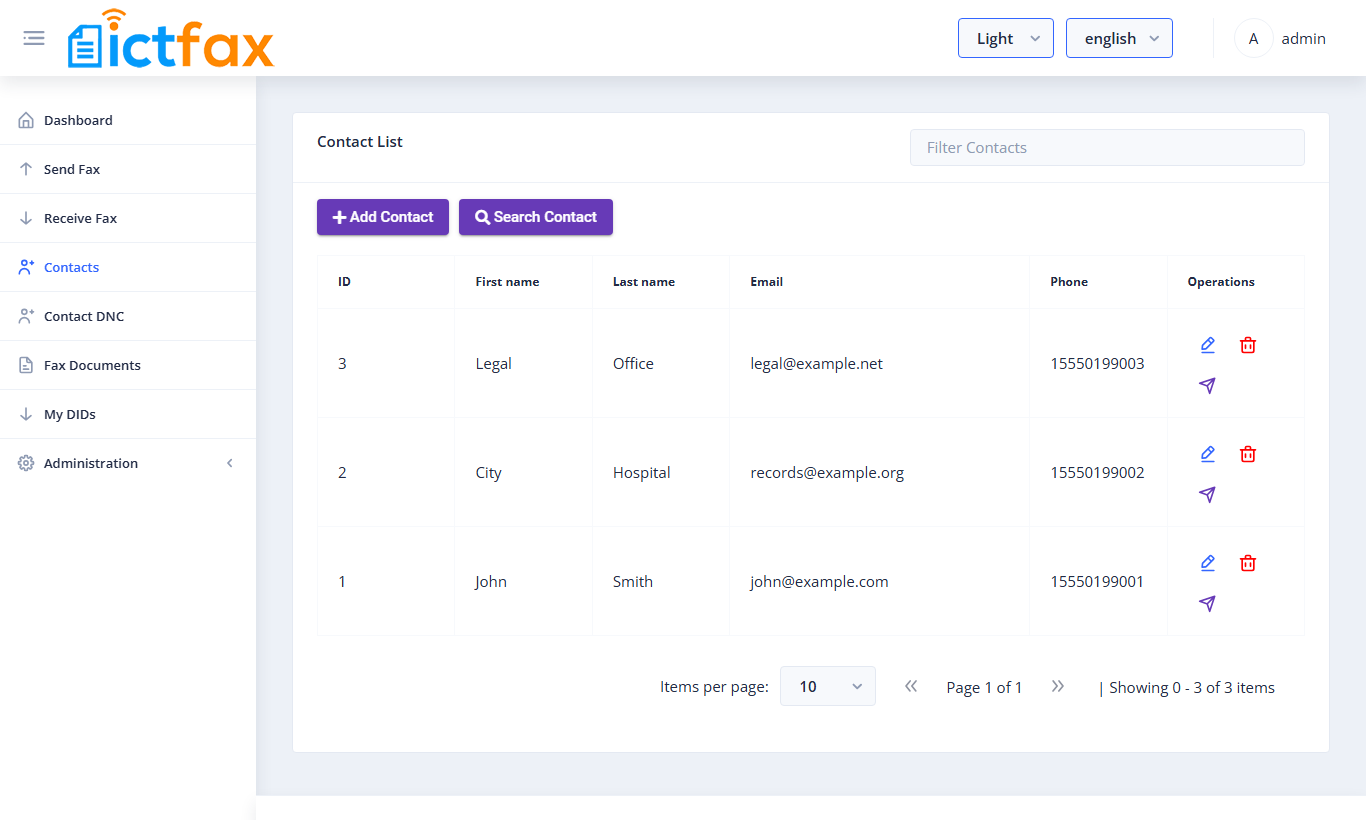
To add someone:
- Click Add Contact.
- Under Personal Information, enter the first name and last name.
- Under Address, enter the Phone (their fax number), the Email and, if you want, a postal address.
- Add any notes under Description.
- Click Submit.
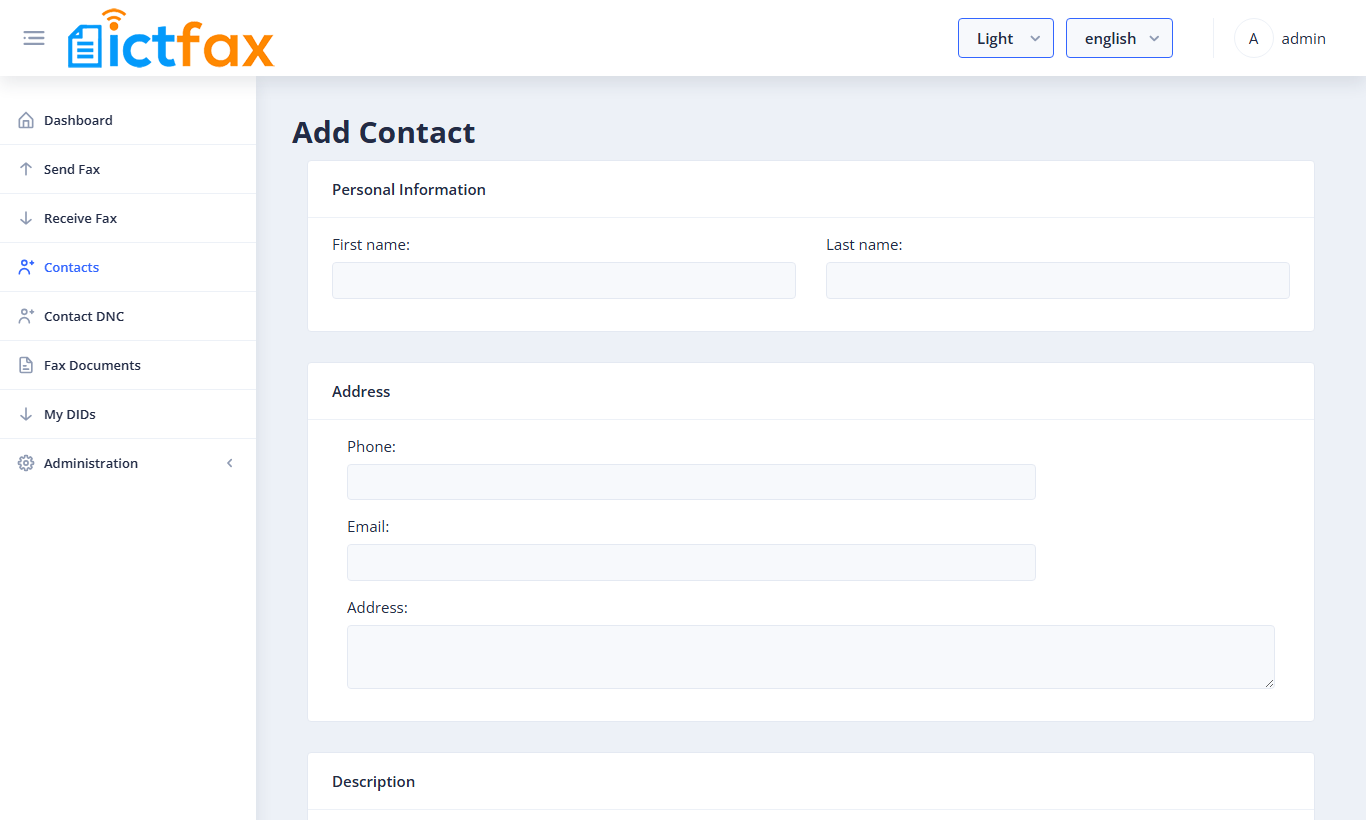
Use the filter box or Search Contact to find someone in a long list.
Contact DNC
Contact DNC is your do-not-fax list. Put a number here and ICTFax will never fax it. If anyone tries, the fax is marked failed(dnc) and isn’t sent. Use it for people who’ve asked you to stop sending, or for numbers you know are wrong.
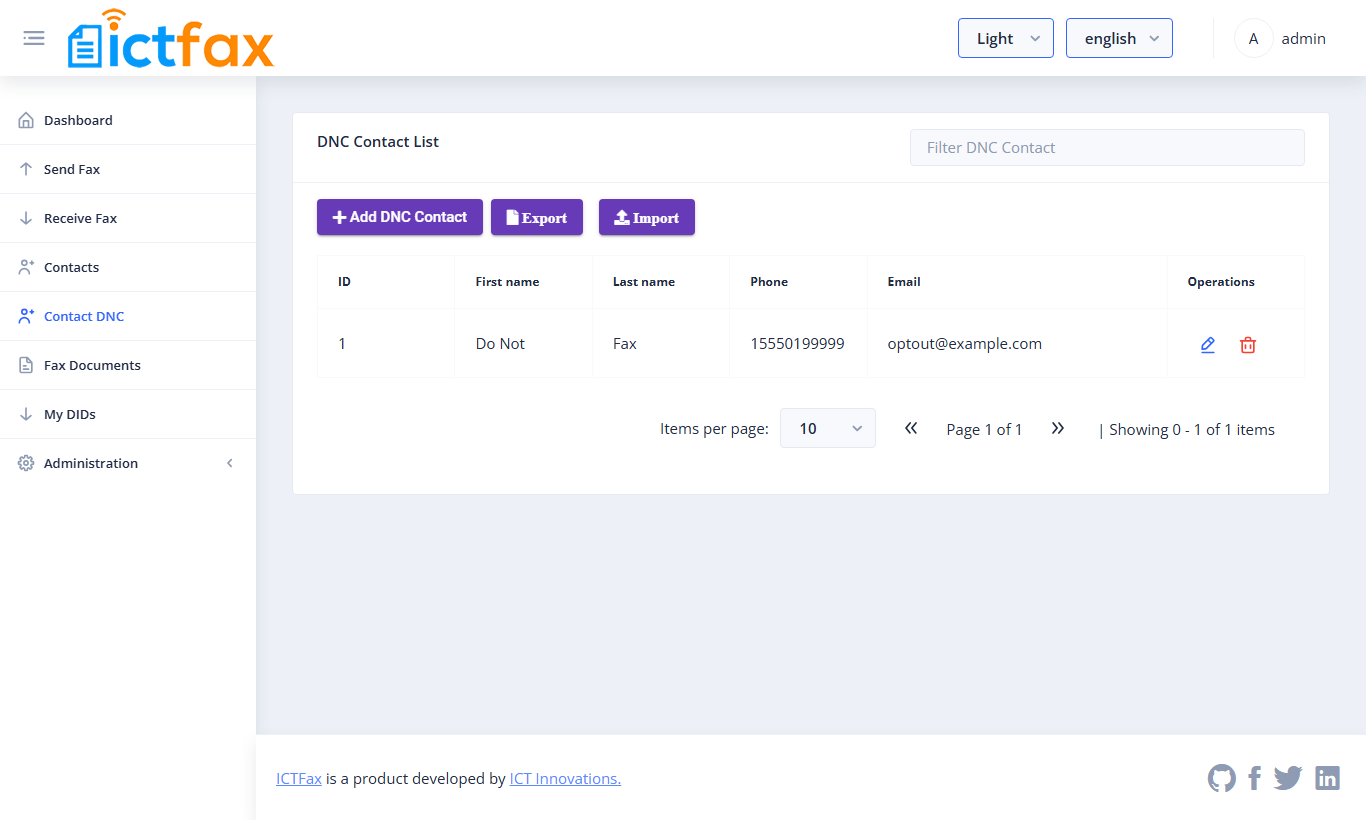
Click Add DNC Contact and fill in the name, phone and email, then submit. Export downloads the whole DNC list. Import adds numbers in bulk from a CSV file. The file has no header row, and the columns go in this order: phone, first name, last name, email, address, custom 1, custom 2, custom 3, description. For example:
"15550199999","Do Not","Fax","optout@example.com","12 Main Street","","","","customer asked to stop"My DIDs and forwarding
A DID is an inbound fax number. Your administrator adds numbers and assigns them to you, and they then appear under My DIDs with their number and title.
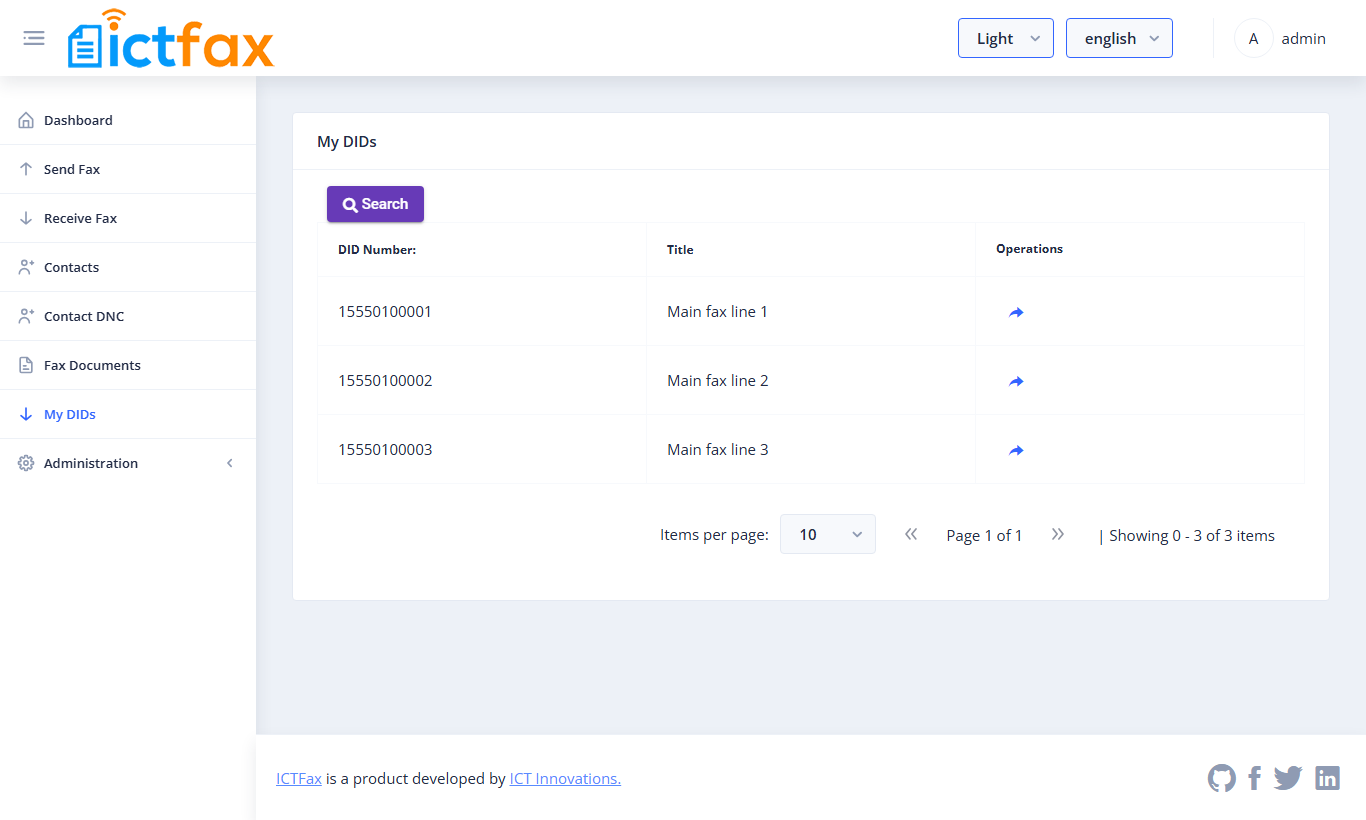
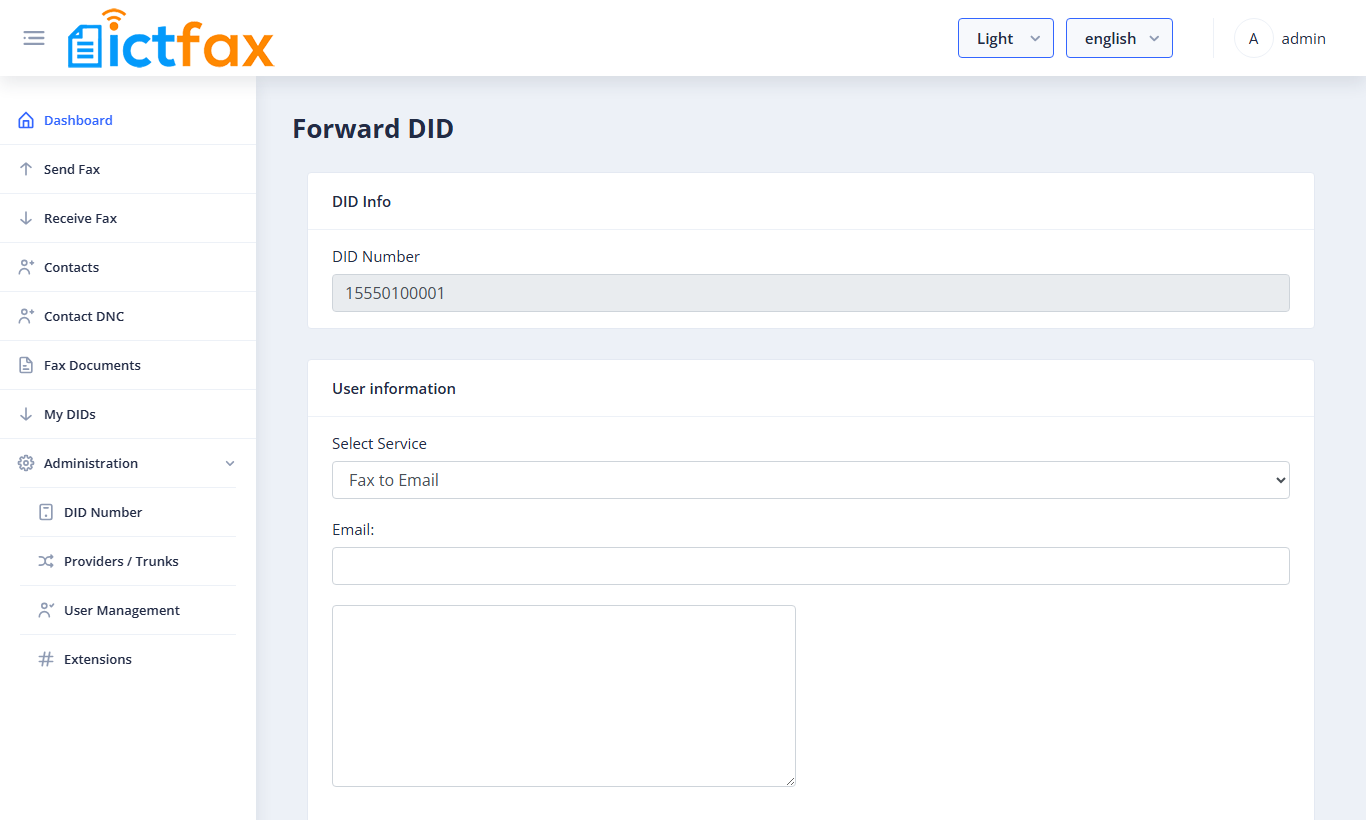
You decide what each number does. Click the forward arrow in the Operations column. The Forward DID page opens with the number at the top and a Select Service drop-down below. Pick one of three services and click Submit.
Fax to Email
Every fax that arrives on the number is emailed as an attachment. Type the main address in the Email field. To send it to more people, use the larger box under it and enter one email address per line. Each line becomes another recipient of the incoming fax, so a whole team can get it at once.
Forward to Extension
Pick an extension and the call is passed live to that device, usually a fax machine plugged into an ATA. The fax prints on the machine. ICTFax doesn’t keep a copy, so it won’t appear under Receive Fax. Setting up the device itself is covered in the fax machine and ATA guide.
No service
The number does nothing. Use it to park a number you aren’t ready to use yet.
Sending a fax by email
You don’t have to open the web interface to send a fax. Email it instead:
- To: the fax number, then @, then your fax domain, for example
15550199001@fax.example.com. Only the digits before the @ are used. - From: the email address on your ICTFax user account. ICTFax uses it to know who’s sending and refuses mail from unknown senders.
- Attachment: PDF, TIF/TIFF, PNG or JPG/JPEG. Office files (DOC, DOCX, ODT, XLS, XLSX, ODS, PPT, PPTX, ODP) are converted for you.
You’ll get an email back when the fax is accepted, when it’s sent, and if it fails. Ask your administrator for your fax domain; they set it up on the server.
Change Password
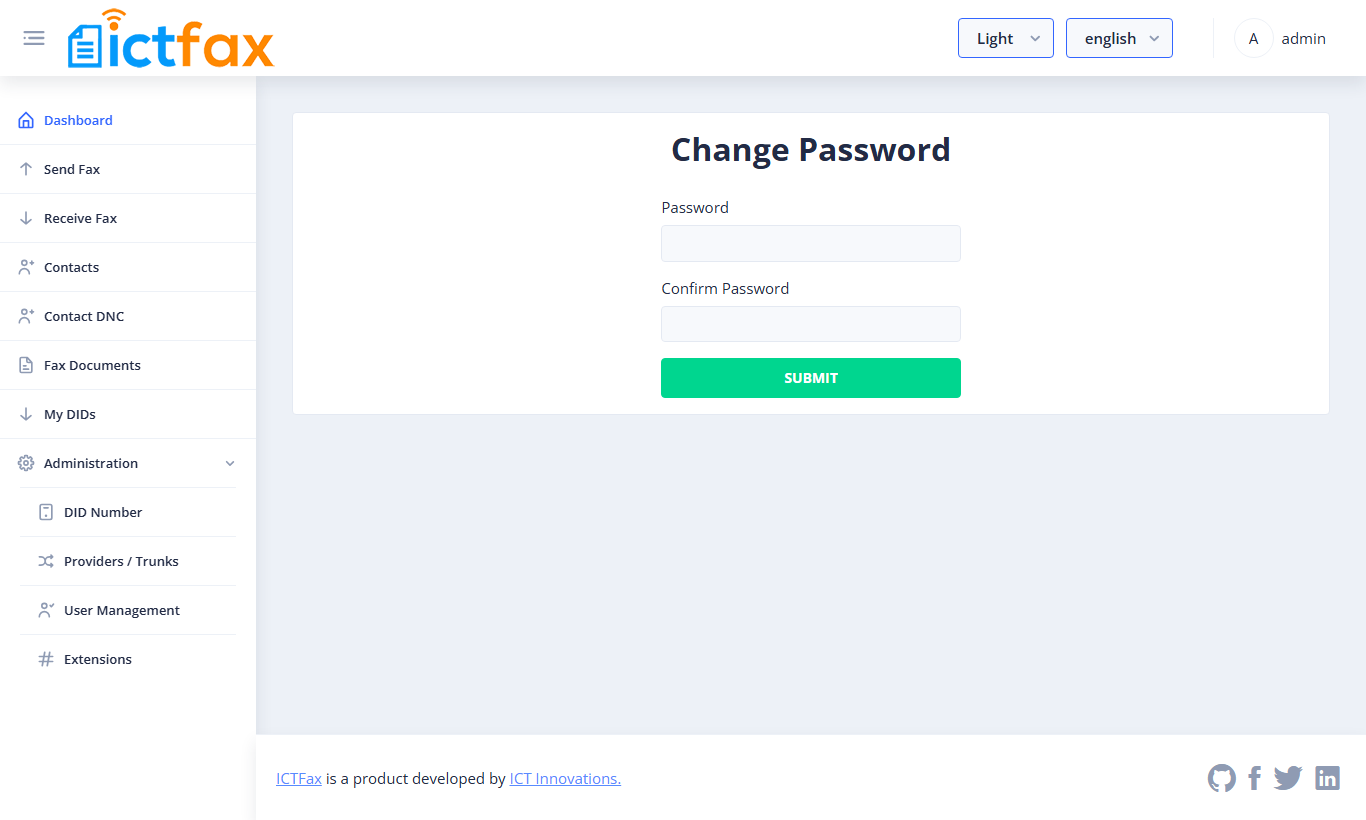
Click your name at the top right and choose Change Password. Type the new password in Password, type it again in Confirm Password, and click Submit.
Want to send faxes from your own software instead of the browser? The fax API tutorial walks through the REST API.
The Community Edition serves one organisation. Multi-tenant hosting, bulk fax, cover pages and reports are available in the ICTFax Service Provider Edition.
FAQ
Which file types can I fax?
From the web interface you can upload PDF, TIF/TIFF, PNG and JPG/JPEG. By email you can also attach Office files such as DOCX, XLSX and ODT, which ICTFax converts before sending.
Why doesn’t a fax I received show under Receive Fax?
Check the number’s forward setting under My DIDs. If it’s set to Forward to Extension, the fax goes straight to the fax machine and ICTFax doesn’t store it. Switch to Fax to Email if you want a copy in your inbox.
Can more than one person get faxes from the same number?
Yes. Set the number to Fax to Email, put one address in the Email field, and add the others in the box below it, one email address per line.
Why is my fax marked failed(dnc)?
The destination number is on the Contact DNC list, so ICTFax didn’t dial it. Remove the number from Contact DNC if it was added by mistake, then send again.
What’s the difference between Standard, Fine and Super quality?
Standard is fine for plain text. Fine and Super give sharper results for small print, signatures and pictures.
I forgot my password. What now?
Click Forgot Password on the Sign In page and enter your email address. ICTFax sends you a reset link. If the email doesn’t arrive, ask your administrator to set a new password for you in User Management.