Send and Receive Your First FAX via ATA
Send and Receive Your First FAX via ATA
SENDING FAX VIA ATA
As Admin
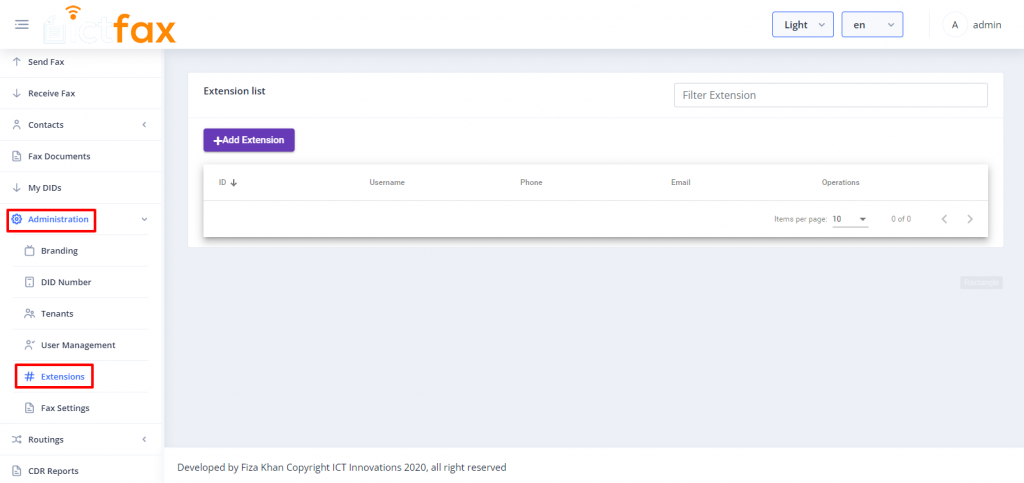
Click on “Administration” menu at left
Move the cursor on “Add extension” on top left of the extension list
Click on “Add extension” button to create new extension, a pop-up form appears on screen fill the required information such as: • User-name • password • Email etc
click on “Submit” button new extension details will be displayed on the detail view once the record has been saved.
Now configure your ATA with registered extension user name and password and IP address/domain name, attach fax machine with ATA and send Fax through fax machine
As User
User can configure ICTFax and fax machines for outgoing faxes as following 1. Click My Extensions from the main menu 2. Click on View against selected extension 3. Note extension configurations, especially username, password, host and port number 4. Connect ATA with network and Fax machine with ATA 5. Open ATA’s web configuration portal and configure it as per extensions configurations. Now user can dial the destination numbers from fax machines and can continue with fax sending process.

RECEIVING FAX VIA ATA
To receive faxs at fax machines, user has to forward his DID number to extension from ICTFax GUI. Please check following for more details. 1. Visit My Incoming numbers from main menu. 2. Select Forward against selected DID 3. In resultant form select Forward to Extension and then select target extension from underneath select field. 4. Click on submit to save new configuration
Note: user still have to configure his ATA with selected extension, as per the instruction given above in Sending Fax section.