

Connect a Fax Machine or ATA to ICTFax
You can keep using your office fax machine with ICTFax. Plug the fax machine into an ATA (analog telephone adapter), register the ATA to an ICTFax extension over SIP, and forward a DID to that extension. Outgoing faxes leave through your SIP provider, and incoming faxes ring the machine. This guide walks through every setting.
How it works
A fax machine speaks analog. ICTFax speaks SIP. The ATA sits in the middle and translates between the two. Here’s the path a fax takes:
Fax machine > ATA > SIP > ICTFax > your SIP provider > the public phone network
- The fax machine connects to the ATA’s phone (FXS) port with a normal phone cable.
- The ATA registers to ICTFax as an extension, using a username and password you create in the ICTFax admin panel.
- When you send, ICTFax passes the call to an active provider (trunk). When a call arrives on one of your DIDs, ICTFax passes it to the extension, so the fax machine rings.
- ICTFax runs on FreeSWITCH. Outbound faxes ask for T.38 first, and FreeSWITCH handles both T.38 and G.711 pass-through. Your ATA should support at least one of these, ideally both.
What you need
- A working ICTFax Community Edition server. If you haven’t installed it yet, follow the ICTFax installation guide first.
- Root shell access to the server, and the admin login for the web panel.
- At least one active SIP provider under Administration > Providers / Trunks, and at least one DID number. The ICTFax admin guide covers both.
- An ATA with an FXS port. Grandstream HT801/HT802, Cisco SPA112/SPA122 and Obihai OBi200/OBi202 are common choices, and we give field names for each below.
- A fax machine and a phone cable.
- A server that includes the October 2026 extension registration fix. Older installs need a one-time manual fix, which is near the end of this guide. If your ATA gets 403 Forbidden when it registers, that’s the first thing to check.
Step 1: Set the server address devices should use
ICTCore keeps the address it gives to devices in the [provisioning] section of /usr/ictcore/etc/ictcore.conf. Out of the box, host is set to localhost. That’s fine for the server itself, but it’s wrong for an ATA sitting somewhere else on the network.
Open the file and set host to the server’s public IP address or hostname:
[provisioning]
host = fax.example.com
port = 5060
This is the value ICTCore hands out through /accounts/{id}/provisioning, so any client that reads its settings from ICTCore gets the right server address.
Step 2: Open the firewall
The ATA needs to reach ICTFax for signalling (SIP) and for the fax audio itself (RTP). ICTFax uses one SIP profile on port 5060 for both providers and extensions. There’s no separate 5070 port any more, whatever older docs say.
| Port | Protocol | Used for |
|---|---|---|
| 5060 | UDP and TCP | SIP from ATAs, softphones and providers |
| 16384-32768 | UDP | RTP media on a normal install (FreeSWITCH default) |
| 16384-16484 | UDP | RTP media in the Docker image (it publishes exactly this range) |
| 80 / 443 | TCP | Web panel and REST API |
| 25 | TCP | Only if you also use email to fax |
If your server uses firewalld, the commands for a normal install look like this:
firewall-cmd --permanent --add-port=5060/udp
firewall-cmd --permanent --add-port=5060/tcp
firewall-cmd --permanent --add-port=16384-32768/udp
firewall-cmd --reload
Running the Docker image? Set SIP_EXT_IP to the server’s public IP. The entrypoint uses it to pin the SIP and RTP address it advertises, and without it devices behind NAT often register fine but get no audio.
Step 3: Create the extension
Each ATA port needs its own extension. Log in as admin and go to Administration > Extensions. You’ll see the Extension list:
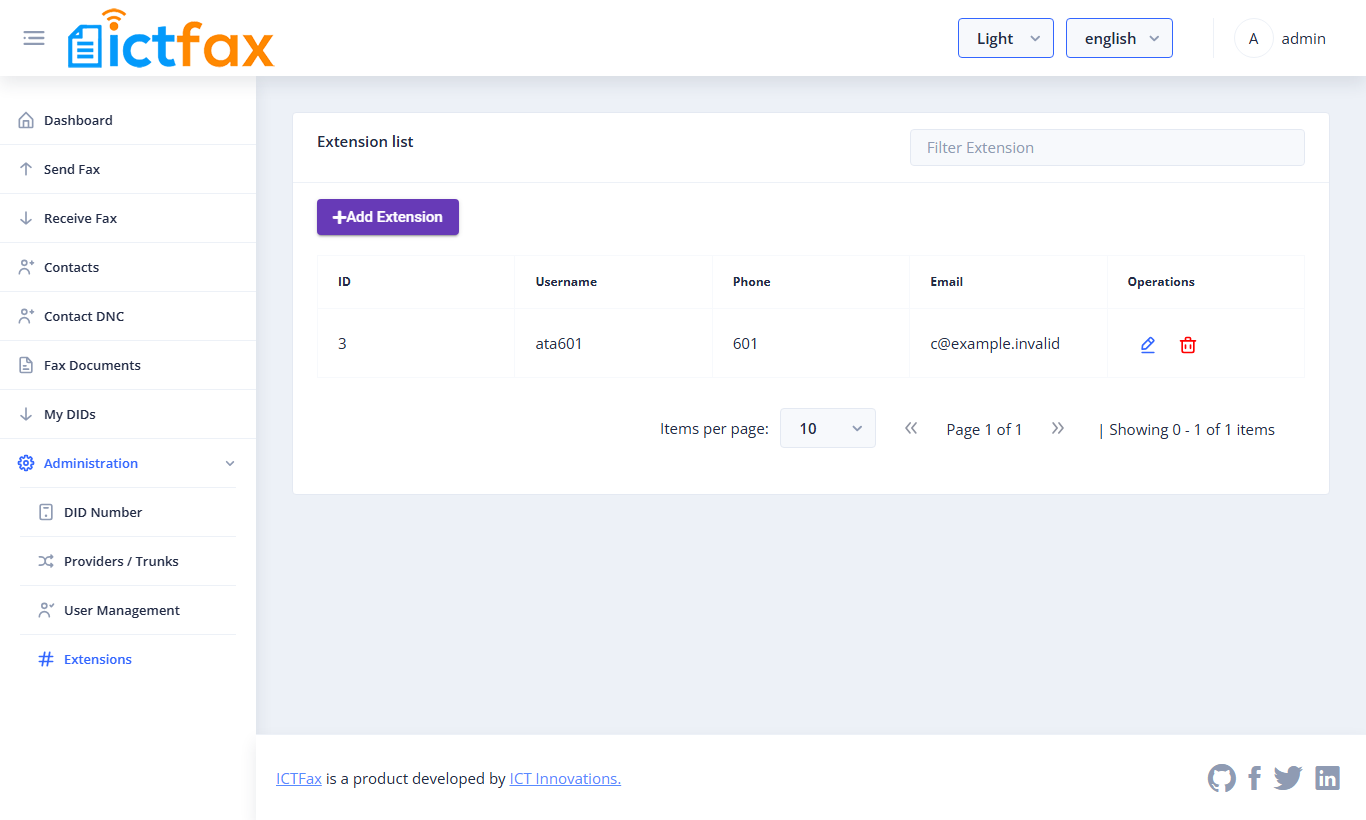
Click to add a new one. The Add Extension form has three parts: Extension information, Password and Name.
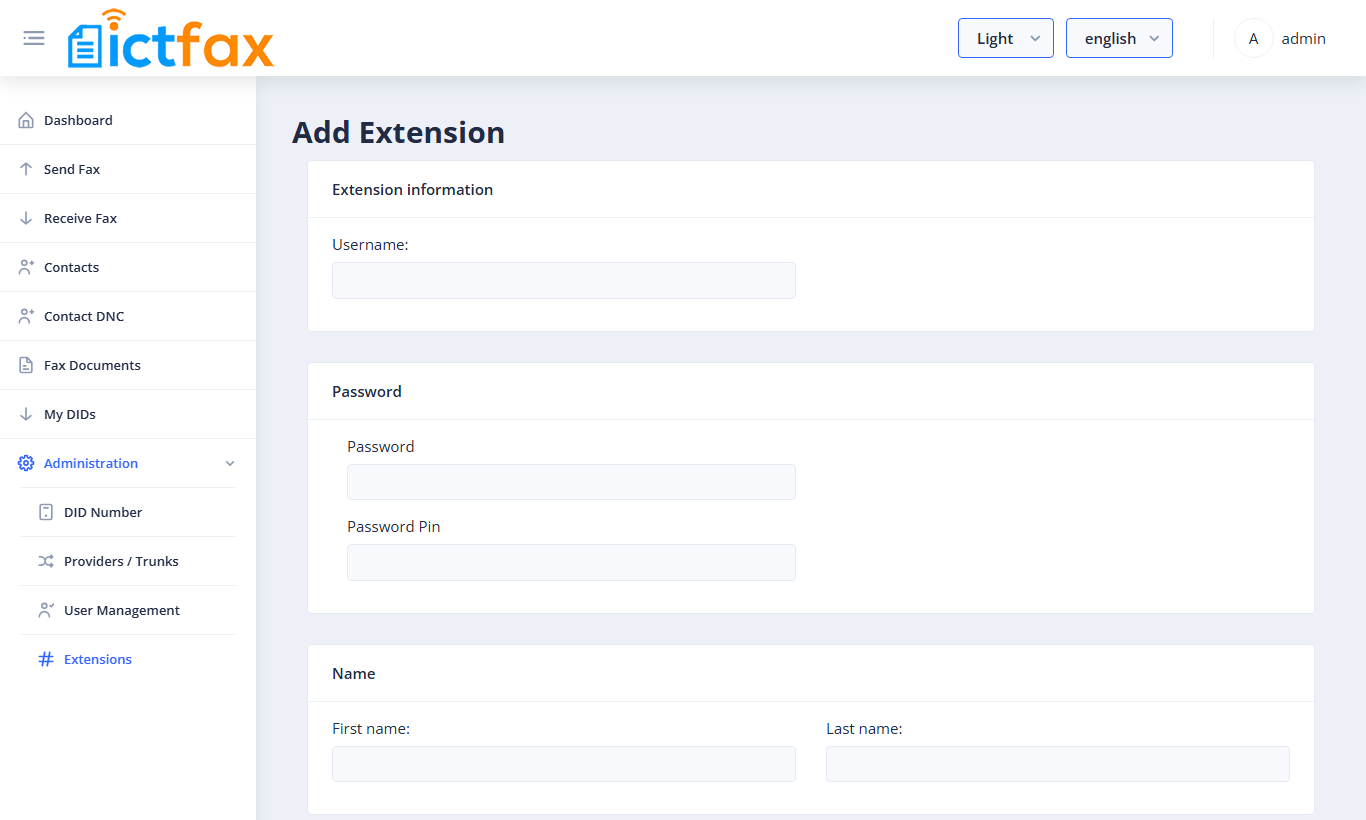
| Field | What to enter |
|---|---|
| Username | The SIP login for the ATA, for example faxroom1. |
| Password | The SIP password. Make it long; this account can place calls through your providers. |
| Password Pin | A voicemail PIN. ICTFax doesn’t use it for faxing, so you can leave it empty. |
| First name, Last name, Email | Who or where the fax machine is, so you can find it later. |
| Phone | The number this extension shows as caller ID when it dials out. It’s also an alias you can dial the extension by. |
| Active | Must be on, or the ATA can’t register. |
Save it and note the username and password, then give them to whoever sets up the ATA. The extension belongs to the user who created it. If you’d rather pull them by script, GET /api/accounts/{id}/provisioning returns the username, password, caller ID, host and port for an extension.
Step 4: Configure the ATA
Open the ATA’s web interface and set up the line the fax machine is plugged into. The registration settings are the same on every brand; only the labels change.
Registration settings
| ATA setting | Value |
|---|---|
| SIP server / proxy / registrar | ICTFax IP or hostname (the same value as [provisioning] host) |
| Port | 5060 |
| User ID | Extension Username |
| Auth ID / Authenticate ID | Extension Username (the same as User ID) |
| Password | Extension Password |
| Domain / realm | The same host. On a fixed build any value works. |
| Registration | On |
| NAT keep-alive | On, if the ATA is behind NAT |
Fax settings
These are general fax-over-IP best practice. They matter more than people expect: a line that’s perfect for voice can still break every fax.
| Setting | Recommended value | Why |
|---|---|---|
| T.38 | Enabled, with fallback to G.711 pass-through | ICTFax asks for T.38 first. Pass-through covers the case where T.38 isn’t possible. |
| Codec | G.711 only: PCMU in North America, PCMA elsewhere | Compressed codecs damage fax tones. |
| Echo cancellation | Off | It treats fax tones as echo and distorts them. |
| Silence suppression / VAD, comfort noise | Off | Fax has pauses that must not be cut or filled. |
| Jitter buffer | Fixed (or the “fax” profile) | An adaptive buffer shifts timing mid-page. |
| Fax tone detection (CED/CNG) | On | Lets the ATA spot a fax call and switch mode. |
Grandstream HT801 / HT802
Typical field names; check your firmware. Settings live on the FXS Port page.
| Field | Value |
|---|---|
| Primary SIP Server | ICTFax IP or hostname |
| SIP User ID | Extension Username |
| Authenticate ID | Extension Username |
| Authenticate Password | Extension Password |
| SIP Registration | Yes |
| Fax Mode | T.38 (or Pass-Through) |
| Preferred Vocoder | PCMU or PCMA |
| Disable Voice Activity Detection | Yes |
| Disable Echo Canceller | Yes |
| Jitter Buffer Type | Fixed |
Cisco SPA112 / SPA122
Typical field names; check your firmware. Settings live under Voice > Line 1.
| Field | Value |
|---|---|
| Proxy | ICTFax IP or hostname |
| User ID | Extension Username |
| Password | Extension Password |
| Use Auth ID / Auth ID | Yes / Extension Username |
| Register | Yes |
| Preferred Codec | G711u |
| Silence Supp Enable | no |
| Echo Canc Enable | no |
| FAX Passthru Method | ReINVITE |
| FAX T38 Redundancy | 1 or 2 |
| FAX CED Detect Enable | yes |
| FAX Enable T38 | yes |
Obihai OBi200 / OBi202
Typical field names; check your firmware. Obihai splits the settings across two areas.
| Where | Field | Value |
|---|---|---|
| Service Providers > ITSP Profile A > SIP | ProxyServer | ICTFax IP or hostname |
| Service Providers > ITSP Profile A > SIP | RegistrarServer | ICTFax IP or hostname |
| Voice Services > SP1 Service | AuthUserName | Extension Username |
| Voice Services > SP1 Service | AuthPassword | Extension Password |
| ITSP Profile A > General | T38Enable | On |
| Codec settings | Codec | G711U, with silence suppression off |
Save, reboot the ATA if it asks, and check its status page. The line should show as registered.
Step 5: Send incoming faxes to the fax machine
Now point a DID at the extension. Go to My DIDs, find the number, and click Forward. Under “Select Service”, pick Forward to Extension and choose the extension you created.
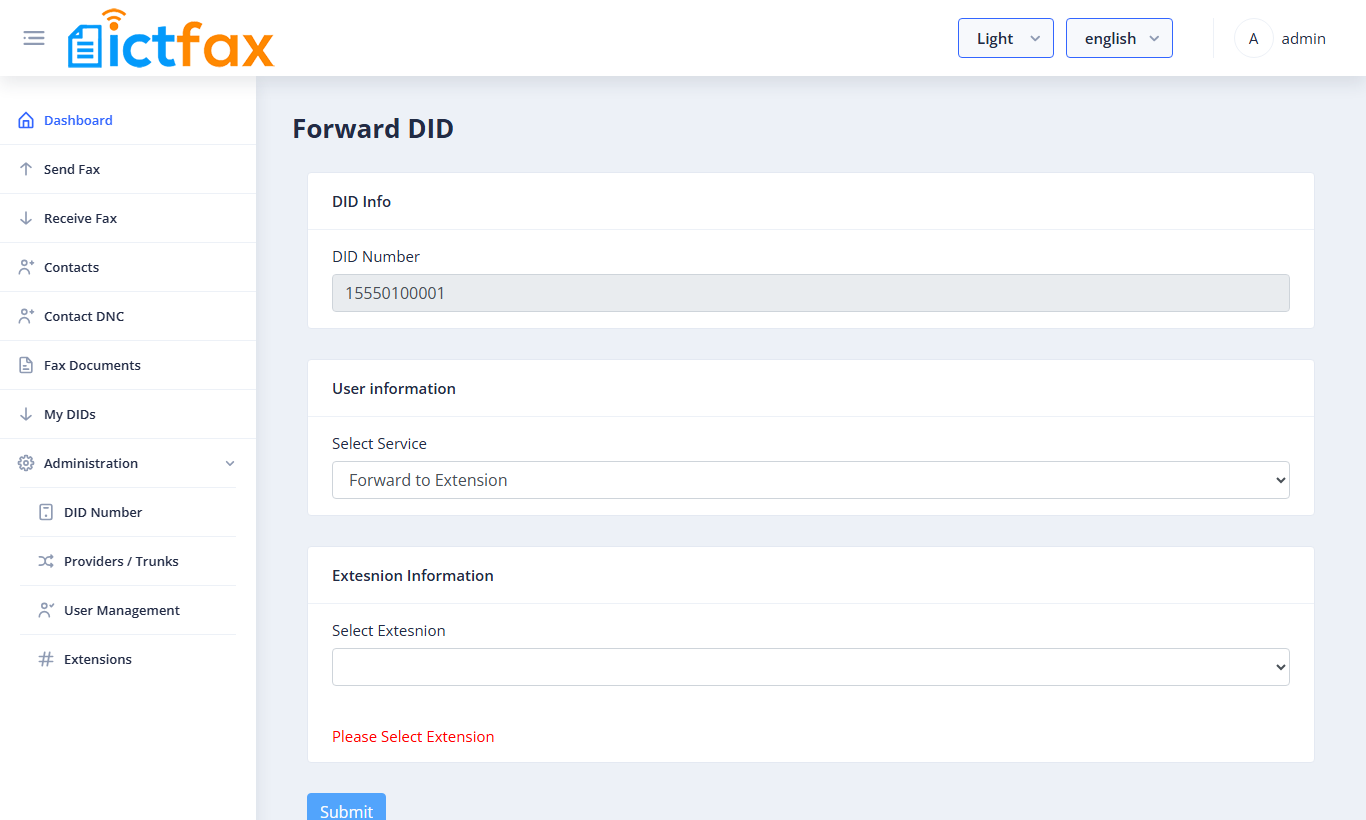
From now on, a call to that DID is passed live to the ATA and the fax machine rings and prints.
Important: ICTFax doesn’t store these faxes. Because the call goes straight through to the device, the fax won’t appear under Receive Fax and there’s no copy to download later. If you want a stored copy, or an emailed one, set the DID to Fax to Email instead. The other choice, No service, leaves the number doing nothing.
Step 6: Send a fax from the fax machine
Put the document in the machine and dial the destination with one of these leading prefixes: +, 00, 011, 01 or 0. ICTFax strips that prefix and sends the call out through your providers.
For example, dialling 0015550199001 sends 15550199001 to the provider. The receiving fax sees the extension’s Phone value as the caller ID, so set that to a number your provider allows you to present.
If your provider wants numbers in a different format, don’t retrain everyone’s dialling habits. Fix it once with the provider’s Prefix field under Administration > Providers / Trunks. Rules are comma-separated remove|add pairs, and the first rule that changes the number wins:
00|strips a leading 00.0|92turns a leading 0 into 92.|1adds 1 in front of every number.- Empty sends numbers unchanged.
The ICTFax admin guide explains the full provider form. You can also dial another extension directly, by its username or its Phone number.
Step 7: Test and verify registration
On the ICTFax server, ask FreeSWITCH which devices are registered:
fs_cli -x "sofia status profile ictcore reg"Your extension should appear in the list with its contact address. If it’s missing, the ATA isn’t registered yet; check the troubleshooting table below.
Then test in both directions:
- Send a one-page fax from the fax machine to a known working fax number.
- Send a fax to your DID from outside, and watch the fax machine print it.
- Once single pages work, try a longer document. Problems with jitter and timing often show up only after the first page.
Troubleshooting
| Symptom | Likely cause | Fix |
|---|---|---|
| 403 Forbidden when the ATA registers | Wrong username or password, extension not Active, or a build without the registration fix | Re-enter the credentials, tick Active and save, or apply the one-time fix below |
| ATA can’t reach the server at all | Wrong server address on the ATA, or port 5060 blocked | Use the public IP or hostname from Step 1 and open 5060 UDP/TCP |
| Registers, but no audio, or the fax fails after the call connects | RTP ports closed, or NAT | Open the RTP range. On Docker, set SIP_EXT_IP to the public IP and publish the RTP range |
| Fax fails on page 1 or mid-page | T.38 mismatch, adaptive jitter buffer, echo cancellation still on | Try pass-through instead of T.38, set the jitter buffer to fixed, turn echo cancellation off |
| Pages still fail after the ATA is tuned | Fax machine sending too fast for the path | Set the fax machine to 9600 bps and turn ECM off |
| Dialling out gets nothing | No active provider, a Prefix rule that doesn’t match, or the number dialled without a prefix | Check Providers / Trunks, review the Prefix rules, dial with +, 00 or 0 |
| Incoming fax prints but isn’t in Receive Fax | Expected: Forward to Extension doesn’t store faxes | Use Fax to Email if you need a stored or emailed copy |
If your install is older than the registration fix
Servers installed before the October 2026 fix don’t let extensions register properly, and ATAs get 403 Forbidden even with the right password. You only need to do this once per server. Run it as root.
1. Link the ICTCore user directory and remove the FreeSWITCH demo users:
ln -sf /usr/ictcore/etc/freeswitch/directory/ictcore.xml /etc/freeswitch/directory/default/ictcore.xml
rm -f /etc/freeswitch/directory/ictcore.xml /etc/freeswitch/directory/default/1[0-9][0-9][0-9].xml /etc/freeswitch/directory/default/brian.xml /etc/freeswitch/directory/default/example.com.xml /etc/freeswitch/directory/default/skinny-example.xml
Security note: that rm also deletes FreeSWITCH’s sample users 1000 to 1019, which all have the password 1234. Anyone who finds your server could register as one of them. Remove them on every install, even if your ATAs already work.
2. Turn on domain forcing in the SIP profile. Edit /usr/ictcore/etc/freeswitch/sip_profiles/ictcore.xml and uncomment these two settings so they read:
<param name="force-register-domain" value="$${domain}"/>
<param name="force-register-db-domain" value="$${domain}"/>
3. Reload FreeSWITCH and restart the profile:
fs_cli -x reloadxml
fs_cli -x "sofia profile ictcore restart"
4. Re-save each extension. Open every existing extension in Administration > Extensions and press Save once. That writes its SIP login. Then reboot the ATA, or let it re-register, and check with the fs_cli command from Step 7.
FAQ
Do I need a T.38 capable ATA?
It’s strongly recommended. ICTFax requests T.38 first, and T.38 copes far better with packet loss than audio. If your ATA only does G.711 pass-through, it can still work on a clean network, as long as echo cancellation and silence suppression are off.
Why don’t faxes sent to my fax machine show up in Receive Fax?
With Forward to Extension, ICTFax hands the call straight to the ATA and doesn’t keep a copy. Set the DID to Fax to Email if you want the fax stored and emailed instead.
How many extensions do I need?
One per ATA port. A two-port ATA such as the HT802 with two fax machines needs two extensions, each with its own username and password.
Which port does the ATA register to?
Port 5060, UDP or TCP. ICTFax uses one SIP profile for both extensions and providers, so you don’t need port 5070.
What caller ID does a fax from the fax machine show?
The Phone value on the extension. Set it to a number your provider lets you present.
Can I use a softphone instead of an ATA?
Yes. A softphone registers the same way, with the extension’s username and password and the server on port 5060. It’s handy for testing registration before you set up the ATA.
For day-to-day sending, receiving and contacts, see the ICTFax user guide. Stuck on something this guide doesn’t cover? Open a support ticket and include your ATA model and the output of the fs_cli registration check.